
Excellent program created by Alfonso Pulido, great amateur astronomer member of the AstroHenares Association, which allows you to find out with total precision where our telescope points from an image of a stellar field.
PROGRAM CONFIGURATION
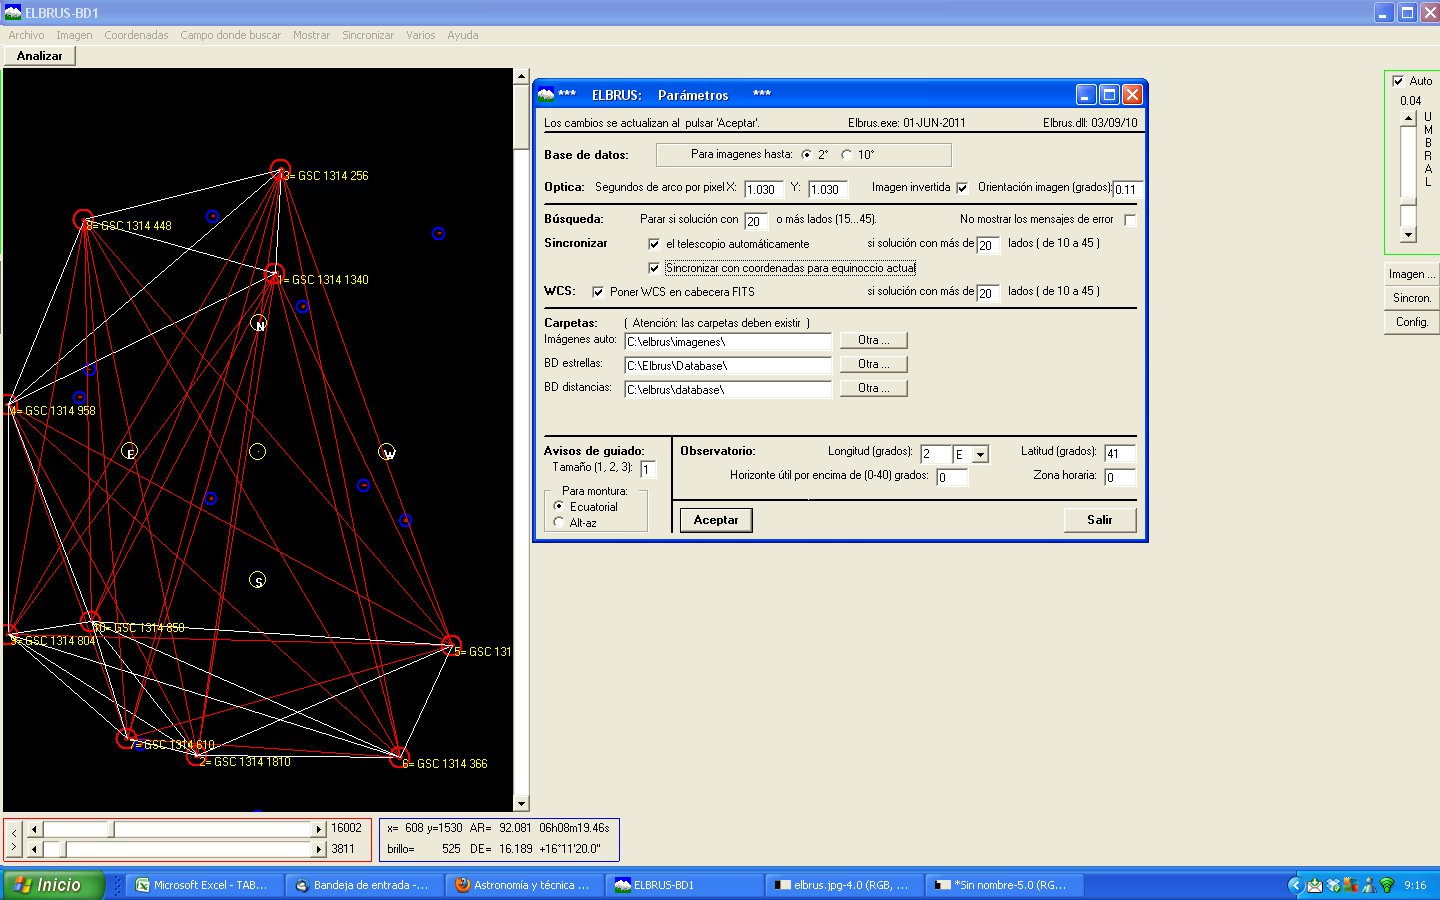
There are several possibilities to configure the program.In this case we start from the basis that we know the resolution per pixel at which we work with our CCD, but later we will see another way to proceed in case of not knowing this data.
To do this we proceed as in this example, we put the resolution in seconds of arc and if possible the angle in degrees of the camera with respect to the north. If we do not know this last data we will see later how to obtain it with Elbrus himself.
In this configuration example we have clicked that the telescope synchronizes automatically after positively analyzing an image. This settings tab is accessed from the Miscellaneous tab, and then edit parameters.
The program can extract the coordinates of where the telescope points in several ways as can be seen in the image below.We recommend that they be extracted from the FITS header of the images, or directly from the COM/ASCOM telescope, but they can also be inserted by hand.
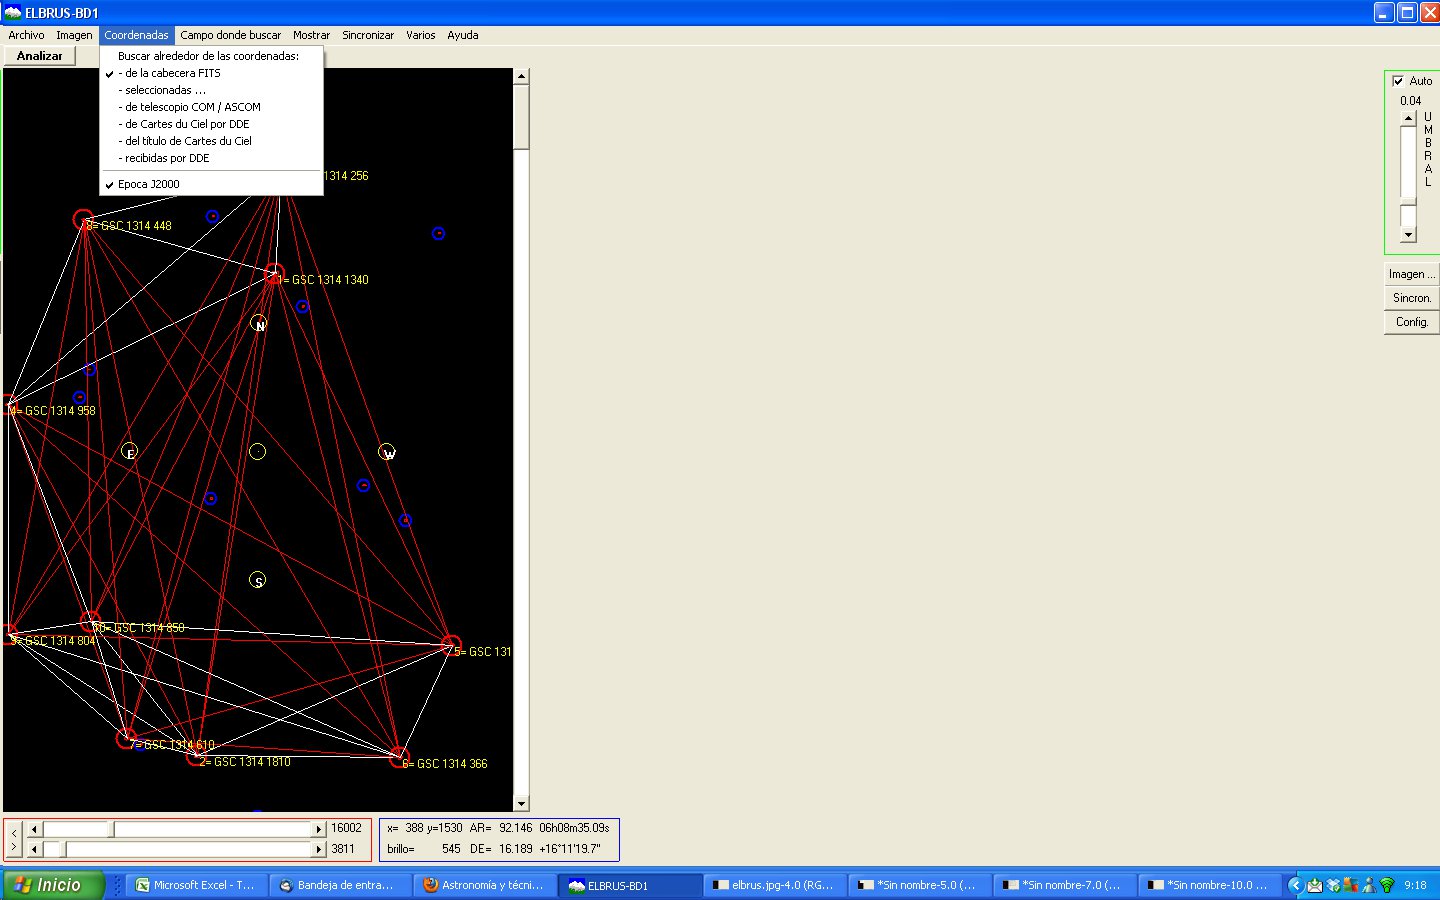
Remember to configure our telescope in ELBRUS so that it can synchronize it in the calculated position with the images. If it is an ASCOM compatible telescope we will mark the option – COM/ASCOM telescope.
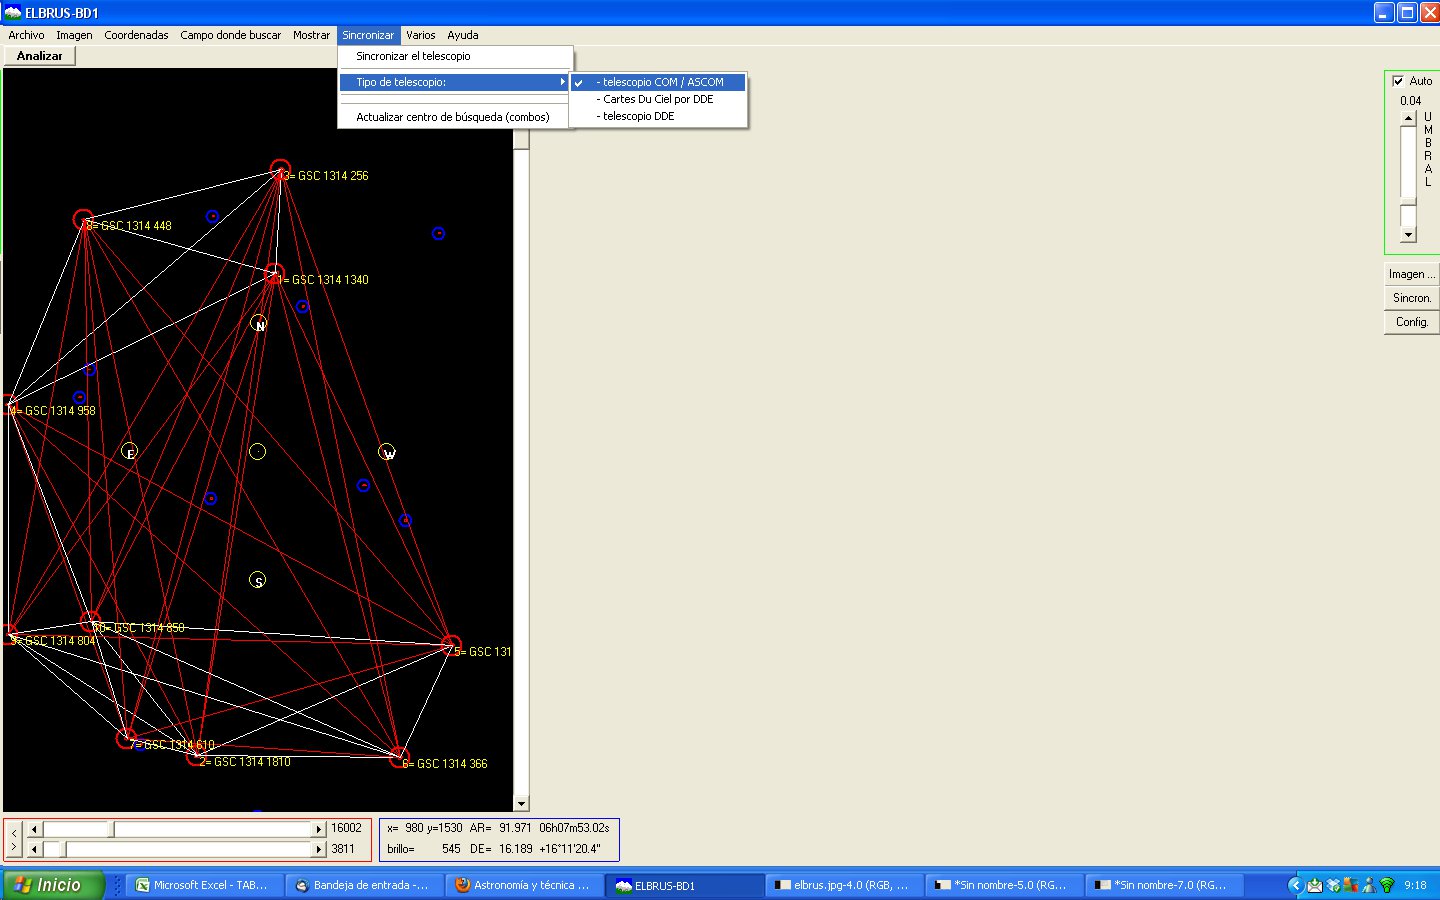
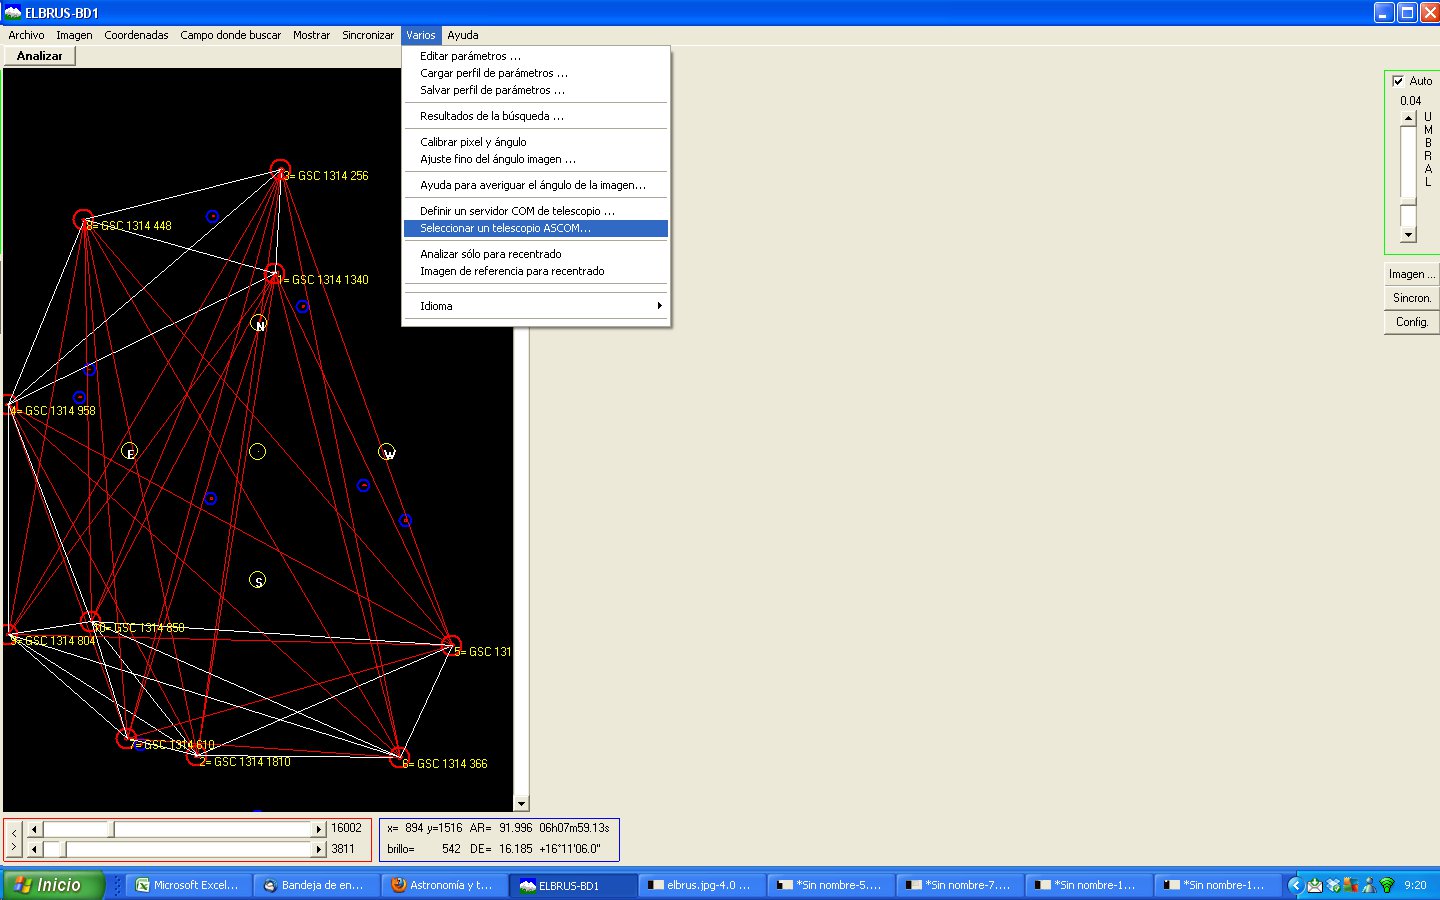
To configure the type of telescope go to the Miscellaneous tab, Select an ASCOM telescope. There we can select among the various types of telescopes available that we have installed.
ANALYZE THE IMAGES
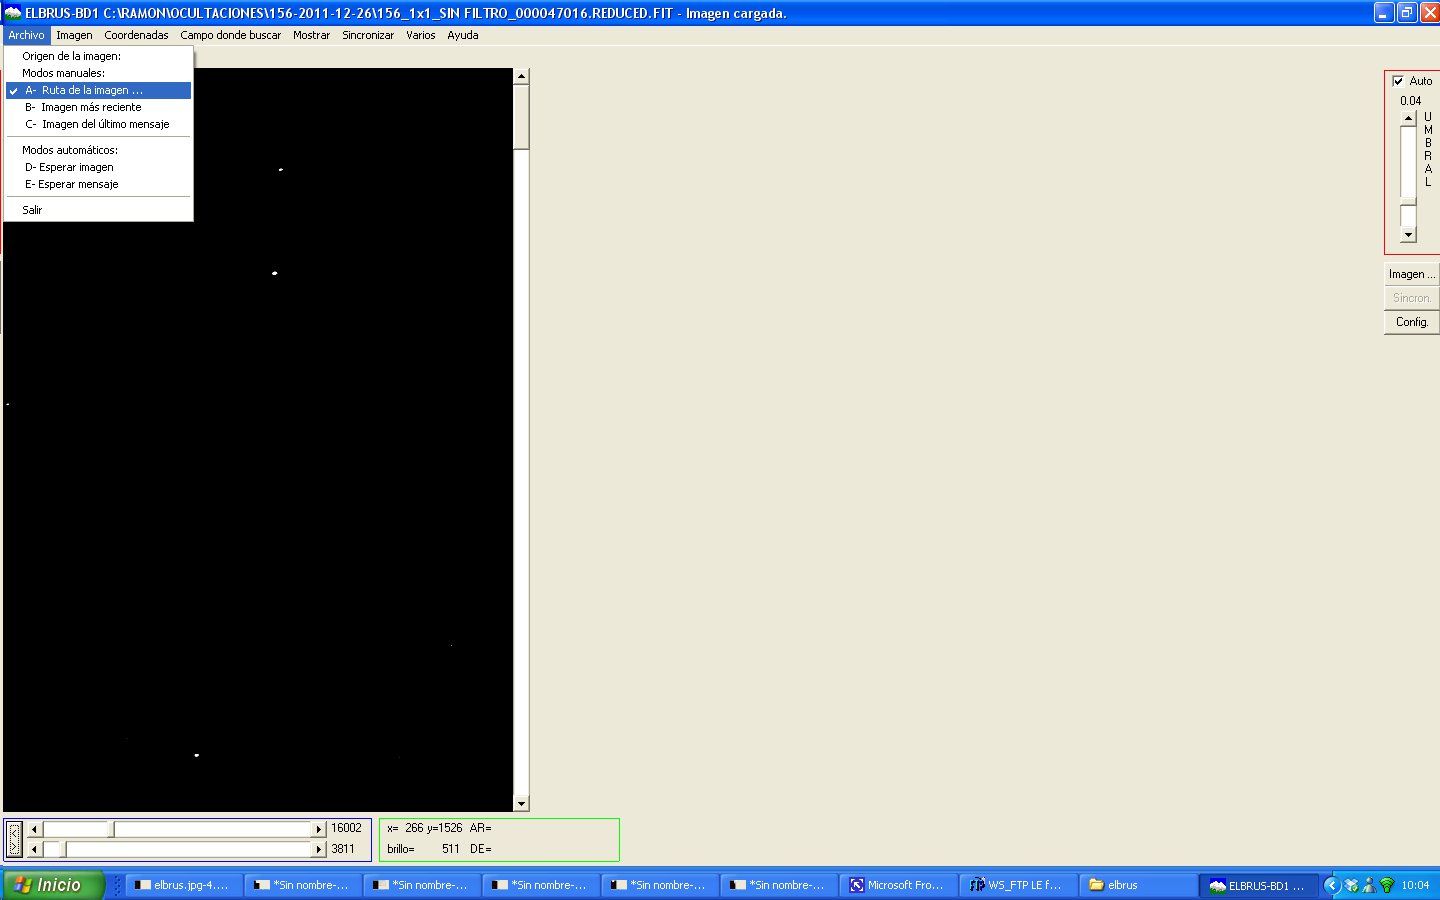
To open an image we click on file, path of the image and a menu will appear to navigate through our hard drive, and select the image that interests us.
We should not worry about the visualization of it, because the program is able to recognize the field despite not adjusting the visualization
Then we open the field tab where to search and choose the most appropriate option, later we will only need to click the analyze button.
AUTOMATIC OPTIONS
1º We know the angle of the camera (which we have put in the tab several) and we have a pointing error LESS than 5 degrees. If we know the angle of the image it is best to use the first option (5×5 field with fixed image angle) in the fork mounts and the second (5×5 field with normal and opposite image angle) in the German frames, so we should not worry about meridian changes.
2º We do not know the angle of the camera but our aiming error is less than 2 degrees or less than 40 minutes. In this case we can choose the 3 and 4 option taking into account that we must make sure that the telescope points to the field that we plan to photograph at least with an error not exceeding 2 degrees and 40 minutes respectively.
After analyzing the image, the program will not only synchronize the mount but will indicate the angle of the image and tell us if you want to save it in the settings (tab several – edit parameters)
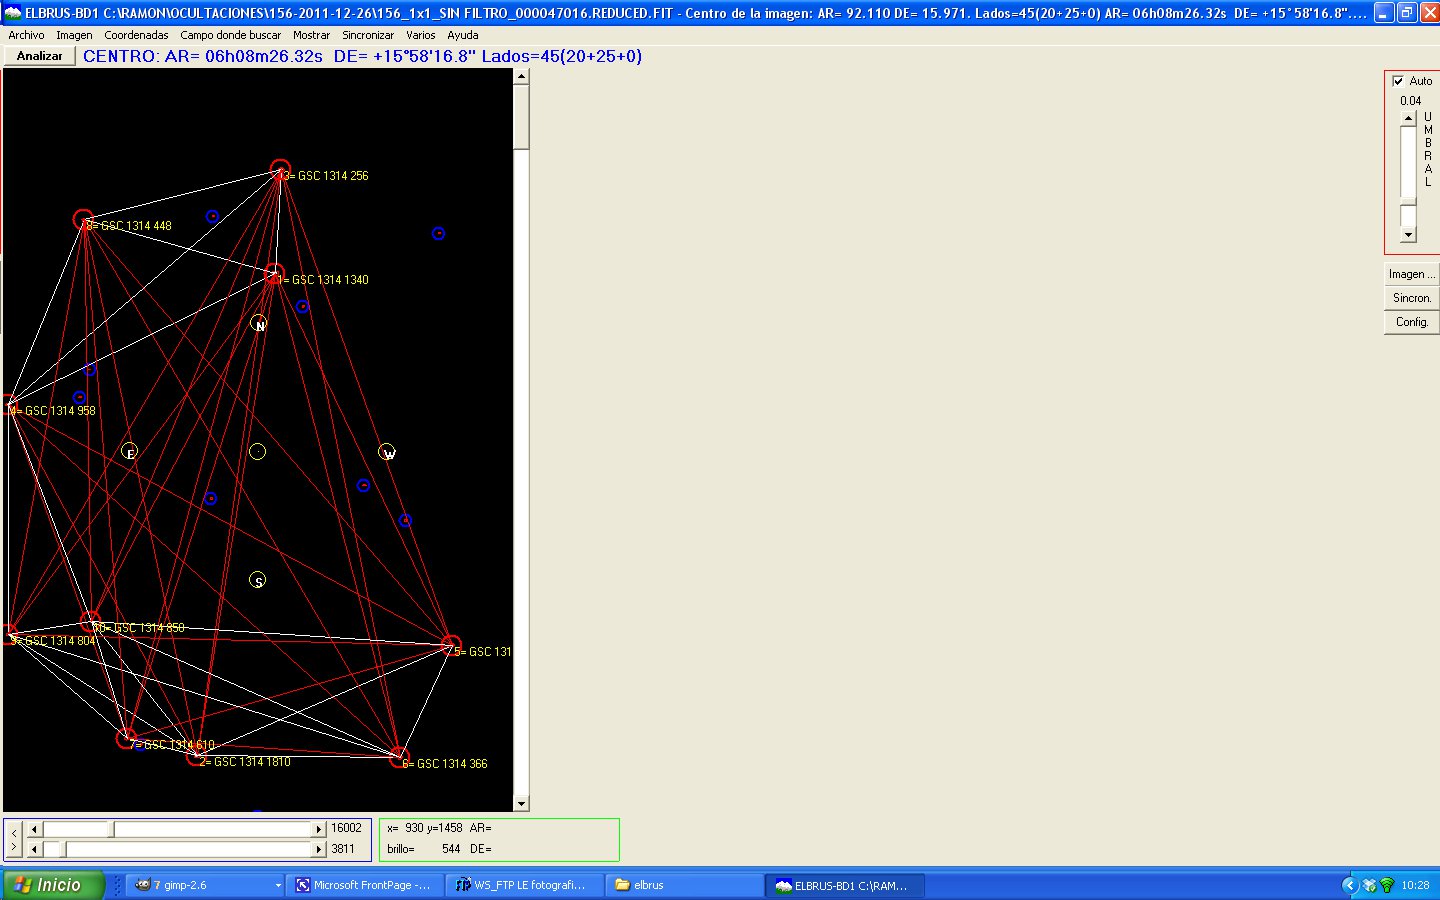
SEARCH OPTIONS
This option is truly useful and powerful and is able to recognize the field despite having virtually no idea where the telescope is pointed. (we must know the resolution and angle of the camera) The option to search in the area of 30 x30 degrees is especially useful and fast, in case of failure we can use the search in the spherical area or even throughout the sky, although they are slower, the solution does not usually take too long
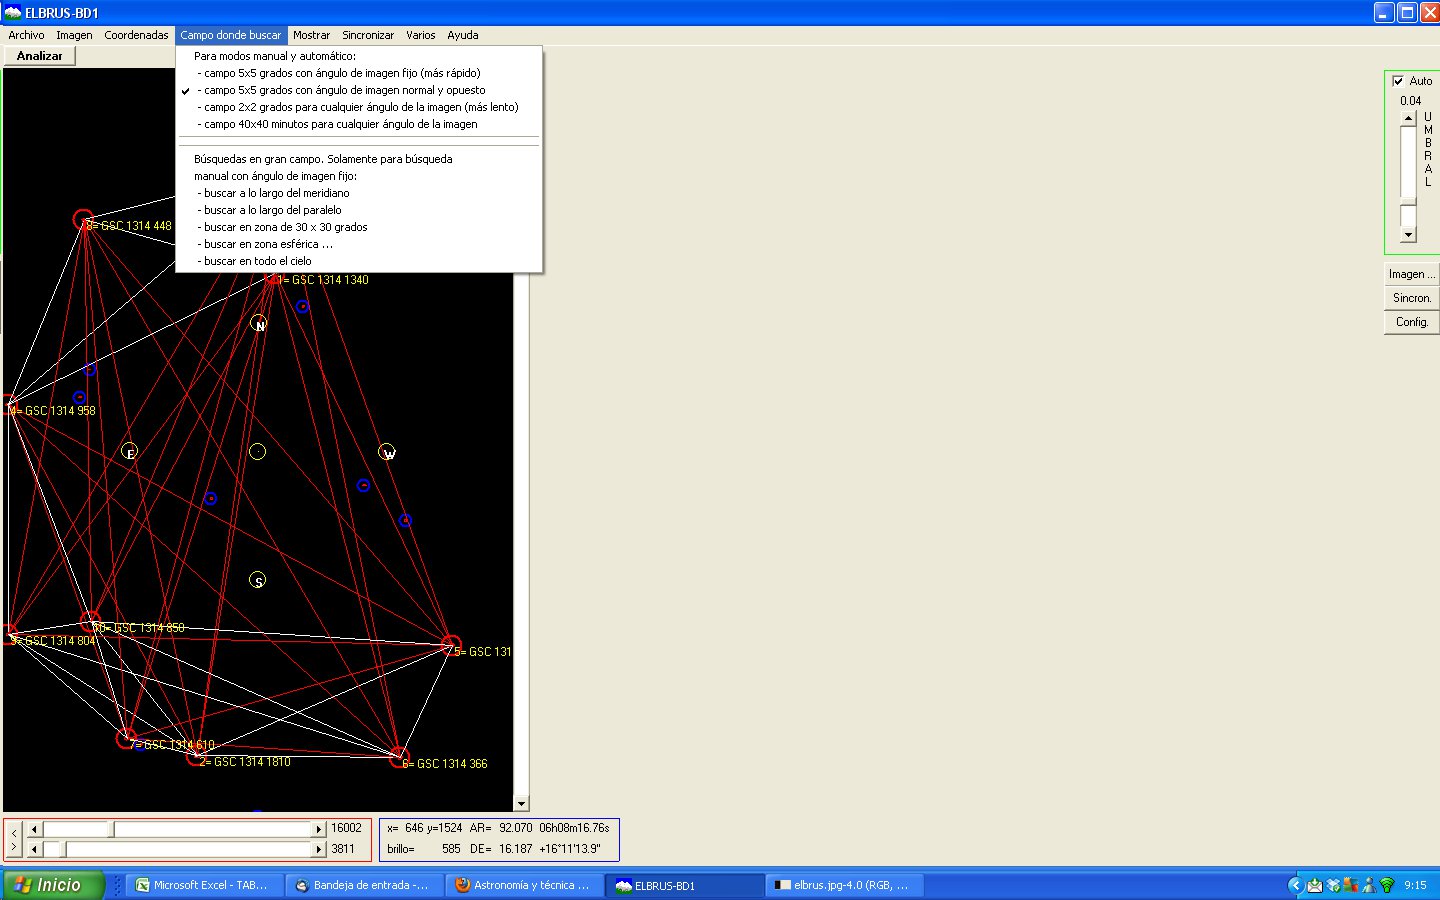
Click on the Analyze button and if everything has gone well, after a few seconds we will obtain a satisfactory solution and the coordinates written above the image.
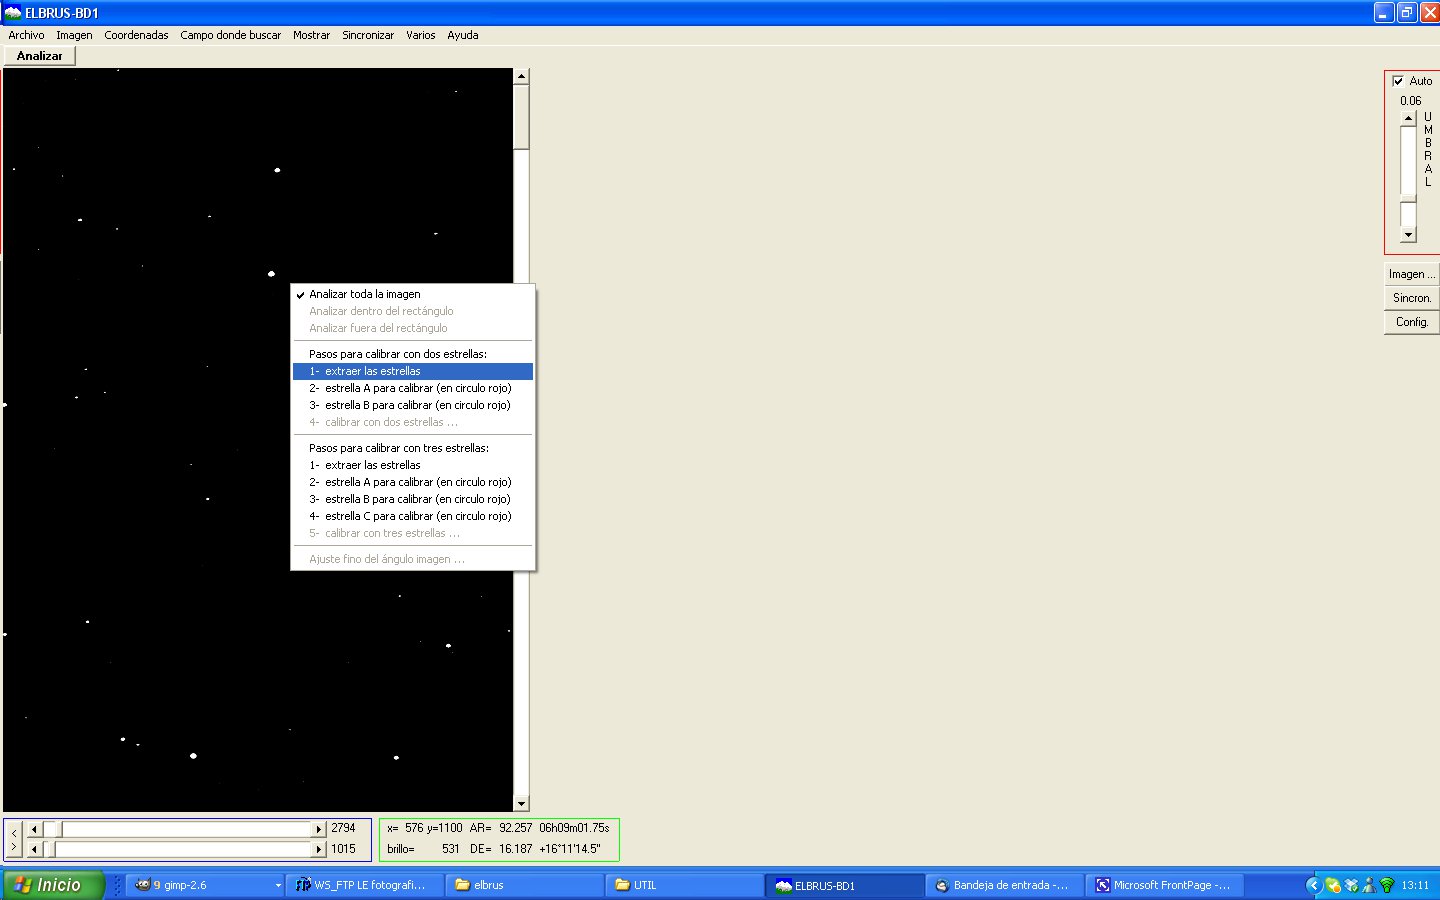
CALIBRATE PIXEL AND ANGLE
In Elbrus we also have the possibility to know the resolution of our team. Let’s imagine that we do not know the resolution per pixel at which we work, and of course not the angle.
With this method we can find out. Click on Miscellaneous – Calibrate pixel and angle.
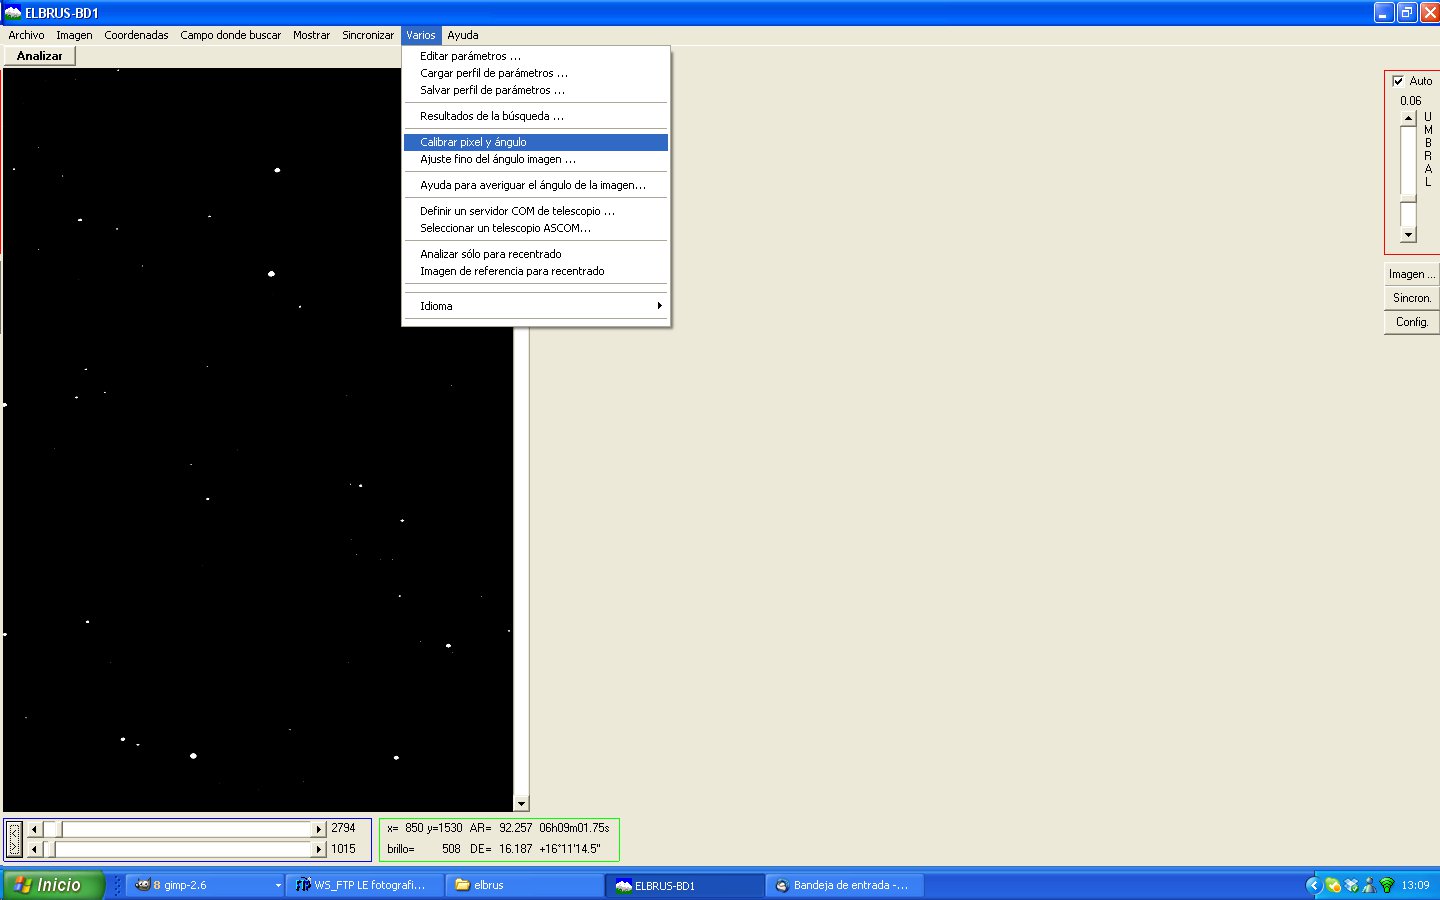
We open an image with stars that we know how to recognize to be from the GSC catalog (if we know their GSC number we will avoid typing the coordinates of them).
Later we follow the steps to calibrate with two or three stars, preferably with the latter.
Click on the number 1 extract stars, and then on the number 2, 3, and 4 selecting the two or three stars that we know how to recognize in the stellar catalog. For them we will need the help of a star chart like Cartes du Ciel, TheSky or almost any planetary program.
We must choose between the stars marked with red color.
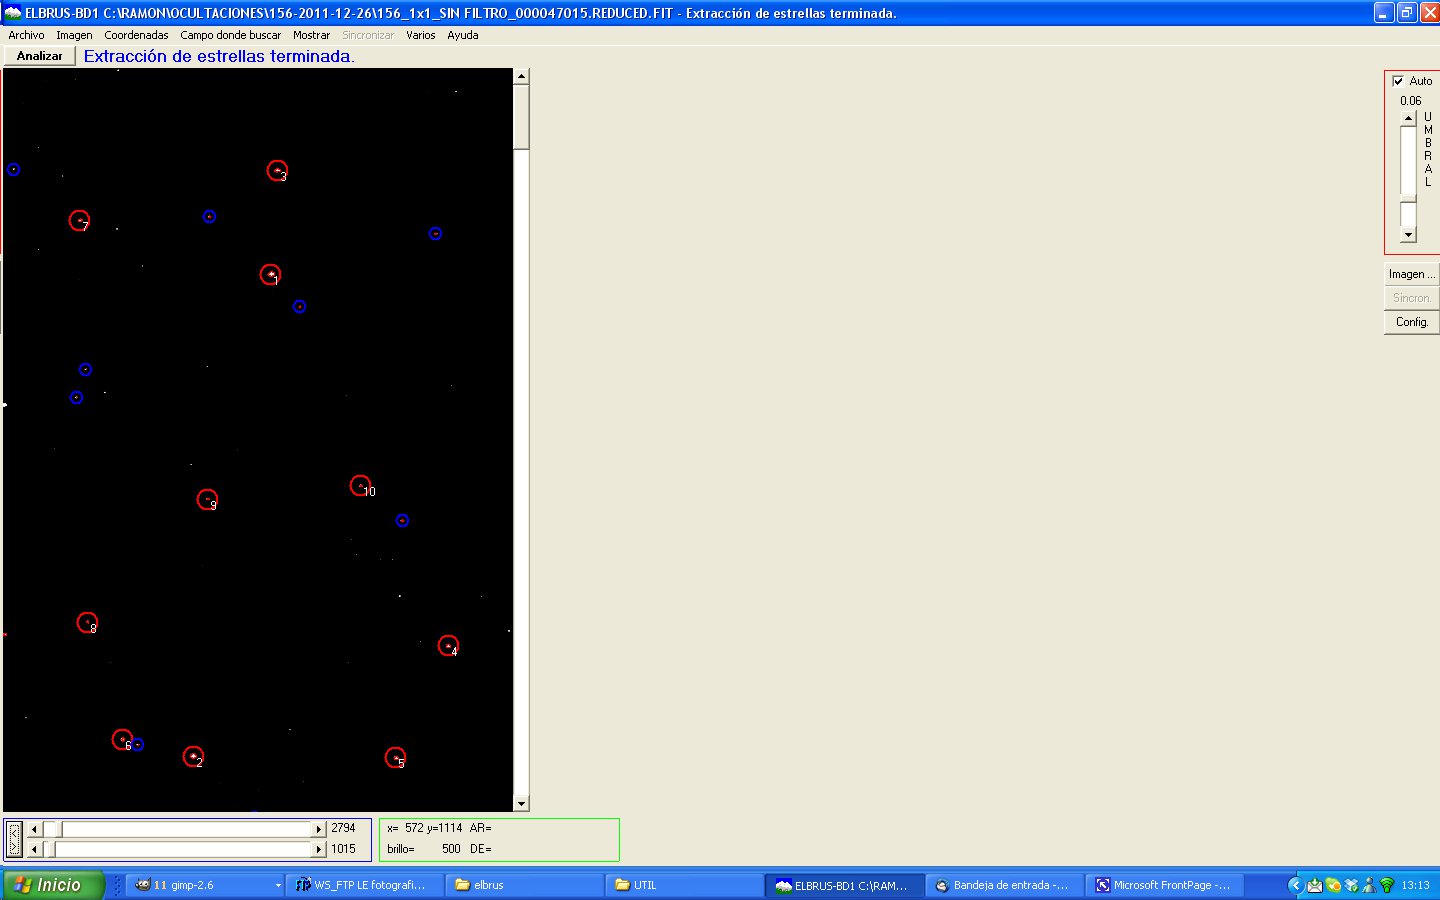
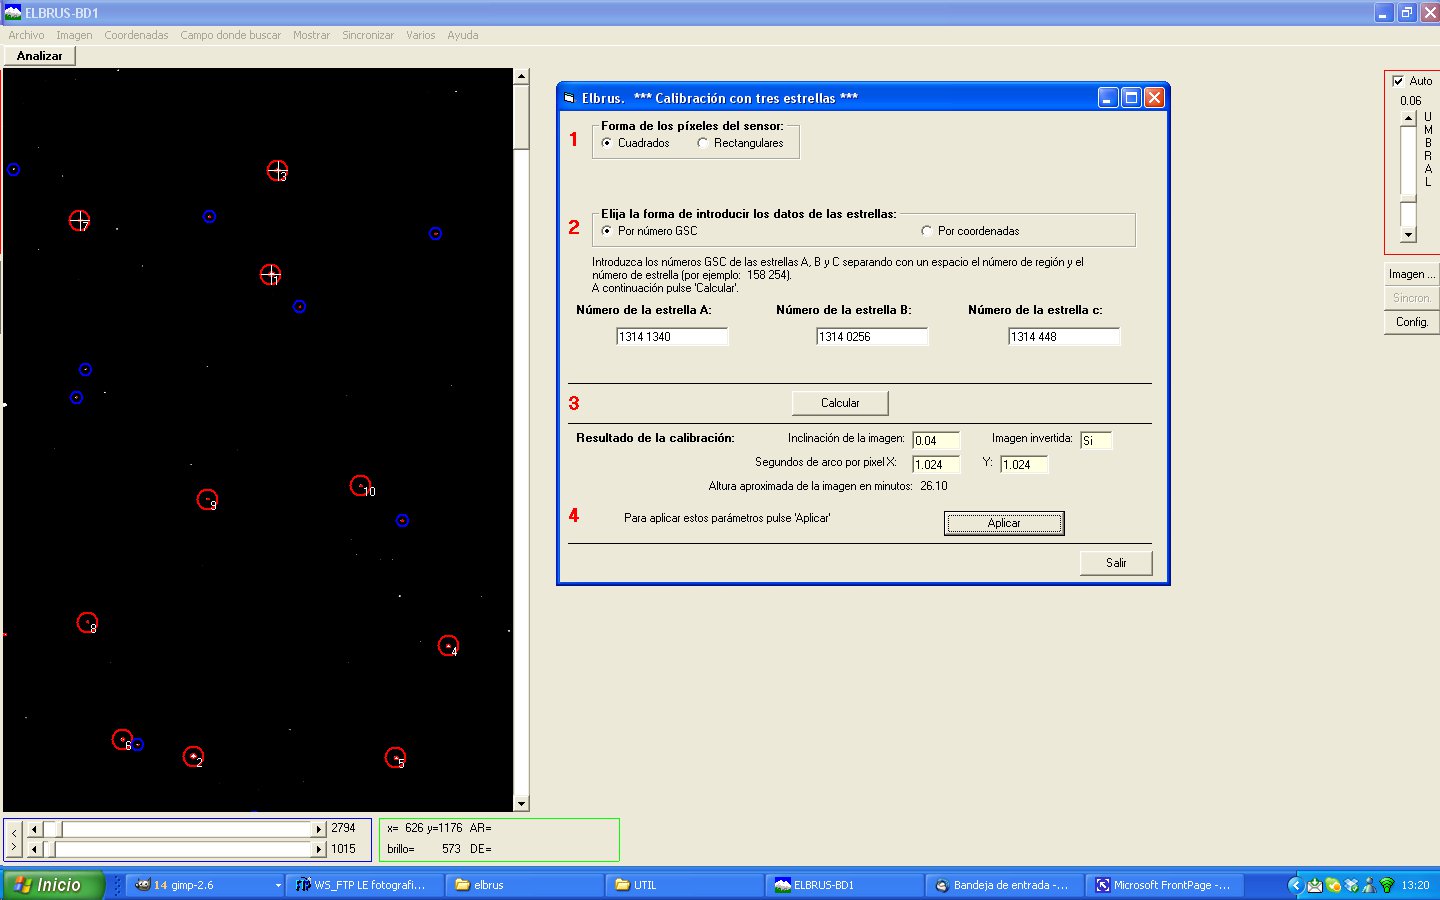
In this example I used stars 1, 3 and 7 as stars A B C respectively, and put their GSC number in the corresponding boxes. In case we do not know your GSC catalog number, we can also use the coordinates of them.
Now we only have to give the calculate button and the program calculates the resolution at which we work and the angle of the image. Finally if we click apply, these values will be saved in the configuration.
To download the program from a single compressed file you can download it from herehttp://cometas.sytes.net/elbrus/elbrus.rar
When you unzip it, all the files are placed in your place, but it will be necessary to download the database files that can be downloaded from the following links:
http://cometas.sytes.net/elbrus/database.rar
http://cometas.sytes.net/elbrus/1database.rar
http://cometas.sytes.net/elbrus/2database.rar
http://cometas.sytes.net/elbrus/3database.rar
http://cometas.sytes.net/elbrus/4database.rar
From here we want to thank Alfonso Pulido for the great work he has done with this software of astronomical image resolution or “plate solving” and Ramon Naves of the MontCabrer observatory for this magnificent tutorial.
ELBRUS AND CCDCOMANDER
We can make ELBRUS understood with CCDCOMANDER.
To do this we must generate a file .bat that calls elbrus, and in CCDCOMANDER make a subroutine that makes an image that is saved in elbrus ,
Here I have given an example of each file. http://cometas.sytes.net/elbrus/ccdcomander
example of the Resuelve_Imagen.bat file
@ECHO OFFDEL
/F C:ELBRUSIMAGESIMAGE_TO_SOLVE. FITFOR
%%i in (C:ELBRUSIMAGESIMAGE_TO_SOLVE_*. FIT) DO (
COPY /Y %%i C:ELBRUSIMAGESIMAGE_TO_SOLVE. FITDEL
/F %%i
)
“C:Elbruselbrus.exe” 8 C:ELBRUSIMAGESIMAGE_TO_SOLVE. FITEXIT
Based on the work of Fernando Limon, for more explanations I refer you to his interesting page.